It’s always exciting to see local businesses making strides in the organic world, and to be able to share that Spicy Organic, a family-owned company based in Frisco, Texas, has just received a grant through the USDA’s Organic Market Development Grant (OMDG) program. This funding is set to help them expand their processing capacity for organic spices, herbs, and grains—a huge win for everyone who values high-quality, organic ingredients in their cooking especially if they are from Texas.
Spicy Organic isn’t just another spice company; it’s a passion project that grew from a love for cooking and healthy living. They’re all about providing the very best organic spices, hand-selected and sourced from small, family-owned farms around the world. They’ve made it their mission to ensure their products are free from harmful chemicals and pesticides and are grown in a way that’s good for both people and the planet – all as a certified organic company.
This new grant will enable Spicy Organic to purchase equipment that streamlines their processing, reduces manual labor, and boosts productivity. This will allow them to open up new market opportunities and meet the growing demand for premium organic spices – one of the fastest growing segments of organic in the US.
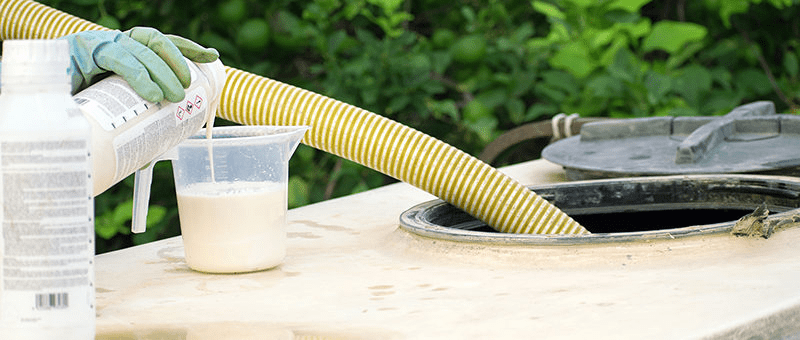
I am not promoting one company over any other companies, but I think the YouTube video of Rob Gibson’s talk at the Bio Controls Conference is excellent and worth a watch as we get into organic spray season.
As Rob talks about in the video, there can be issues with water pH, physical or chemical incompatibility or a host of other issues that can crop up with tank mixes. It is an 18-minute presentation, not much time compared to cleaning out a gunky mess in your lines or maybe a final spray that doesn’t even work because of an issue with your solution. Sometimes our organic products get negative reviews when the real issue is how we mixed the spray solution and not the products in the spray solution!
Here is an outline of his talk:
Introduction
Good afternoon, everyone. My name is Rob Gibson, and I am the Global Portfolio Manager for Certis. I have an extensive background in biological solutions, starting in wastewater, then moving into animal health and nutrition, and aquaculture. Since 2016, I’ve been focused on bio-ag in commercial roles.
Overview of the Presentation
Today, I’ll be discussing the do’s and don’ts of tank mixing biologicals. I’ll touch on the full cycle of product development and the critical questions involved in taking a product from an idea to a market-ready innovation. I’ll explore what goes into tank mixing, the importance of formulations, and how scientists ensure stability and efficacy while maintaining compatibility in tank mixes.
Product Development and Innovation
When we think about developing a new product, several key considerations arise:
Importance and Relevance: What gap does the product fill? Is it addressing resistance issues, or is it a completely new solution that could transform the industry?
Road to Success: The path to success varies with each product. It involves numerous trials to convince regulatory bodies, investors, and internal management of the product’s viability. However, the grower is the ultimate decision-maker on whether a product succeeds.
Understanding the Grower’s Perspective
For a product to be successful, it must fit into the grower’s budget and daily regimen. This is where innovation and rapid development are crucial. While chemistries and biologicals often find themselves at a crossroads, the latter has more specific conditions, especially in the tank. The formulation scientist’s role is critical in ensuring the stability and efficacy of the product while ensuring compatibility in tank mixes.
General Mixing 101: Why and What
Let’s consider the primary benefits of tank mixing:
Pest Control: Growers need to control as many pests as possible with a single solution.
Efficiency: Mixing reduces time, water, energy, and labor, which translates into cost savings.
Diverse Solutions: A broader pest control spectrum allows growers to protect their crops from multiple angles, reducing the risk of resistance.
Water’s Impact on Tank Mixing
Water is the primary input in tank mixing, and understanding its properties is crucial:
pH: Acts as a gatekeeper for product dissolution and can affect the efficacy of bio-controls.
Mineral Content: Hard water can lead to mineral bonding, compromising the tank mix.
Temperature: Impacts the time it takes for products to dissolve and become active.
Steps for Tank Mixing
Here are the steps to ensure a successful tank mix:
Read the Labels: Thoroughly understand what and when to add products to the tank.
Shake Inputs: Ensure there’s no settling or collection at the bottom of your containers.
Add Water First: Never add biologicals to an empty tank. Always add water to neutralize pH and temperature.
Agitate: Start agitating the water before adding inputs, and add chemistries before bios.
Mix Thoroughly: Allow time for proper mixing. Smaller tanks need about three minutes, while larger tanks may require five to ten minutes.
Final Water Addition: After mixing, add the remaining water to complete the tank’s volume.
pH Check: Conduct a final pH test before application to ensure safety and readiness.
Considerations for Physical and Chemical Incompatibilities
It’s essential to be aware of physical and chemical incompatibilities in tank mixes:
Suspension Issues: Products not suspending properly can lead to uneven distribution.
Clumping: Can disrupt mixing and reduce the effectiveness of your bio-controls.
Layering: If layering occurs, your bios may not be properly dispersed.
Foaming: Excessive foaming, usually addressed in the formulation process, can indicate a problem with your mix.
Specific Watch-Outs in Formulation Types
Emulsified Concentrates: Watch for phytotoxicity risks. Adding an emulsifying agent or organic solvent can help.
Soluble Liquids and Suspended Concentrates: These water-based solutions are typically easier to mix and have a lower risk of challenges.
Dry Flowables and Wettable Powders: These can be tricky, with wettable powders being the most challenging due to the risk of clumping.
Addressing Common Concerns
There are some common concerns related to tank mixing that need to be addressed:
Mixing with Antimicrobials: Products like oxidate or biocides containing peracetic acid or hydrogen peroxide can wipe out your bios if mixed together. To mitigate this, alternate your sprays and wait 30 minutes to an hour before applying bios after sanitizing.
Copper and Low pH: Copper, being a bacteriocide, can reduce your bio-controls’ efficacy if mixed at a low pH. Avoid mixing these to prevent reduced CFU counts and phytotoxicity.
Calcium Chloride: This can cause an exothermic reaction, raising the tank’s temperature and potentially harming non-spore-forming bios. Keep an eye on calcium chloride concentrations and consider rotational spraying.
High pH with Viruses and BTs: A pH above 9 can destabilize proteins in your bios, deactivating their modes of action. To mitigate this, avoid letting the bios sit in the tank too long at high pH levels.
SWOT Analysis Review
Let’s quickly review the strengths, weaknesses, opportunities, and threats (SWOT) of tank mixing biologicals:
Strengths:
Less exposure and handling
Lower costs
Reduced water usage and increased field efficiency
Weaknesses:
Few publications, though improving
Changing regulatory landscape
Fear of incorrect mixing
Opportunities:
Improved formulation technologies designed for tank mixing
Better mixing tools
Real-time guidance from manufacturers
Threats:
Compatibility issues
Environmental impact
Shifts in raw materials and evolving regulations
Final Recommendations
Check Pesticide Labels: Always refer to the label for tank mix recommendations and potential inhibitory effects.
Perform a Jar Test: When trying a new mix, perform a jar test to ensure compatibility.
Mix According to Labels: Add chemistries first, followed by bios.
Double Check Equipment Filters: Ensure that your equipment is clean and ready to avoid any issues during application.
Consult with Experts: If you have questions, reach out to the product manufacturer or another specialist for guidance.
Conclusion
One last tip—avoid mixing antimicrobials with microbial products in your tank. This is a common mistake that can compromise your entire application.
Thank you for your time and attention today. I’ve kept it brief so you can enjoy the rest of your day. I appreciate the opportunity to speak with you and thank you for sticking with me until the end.
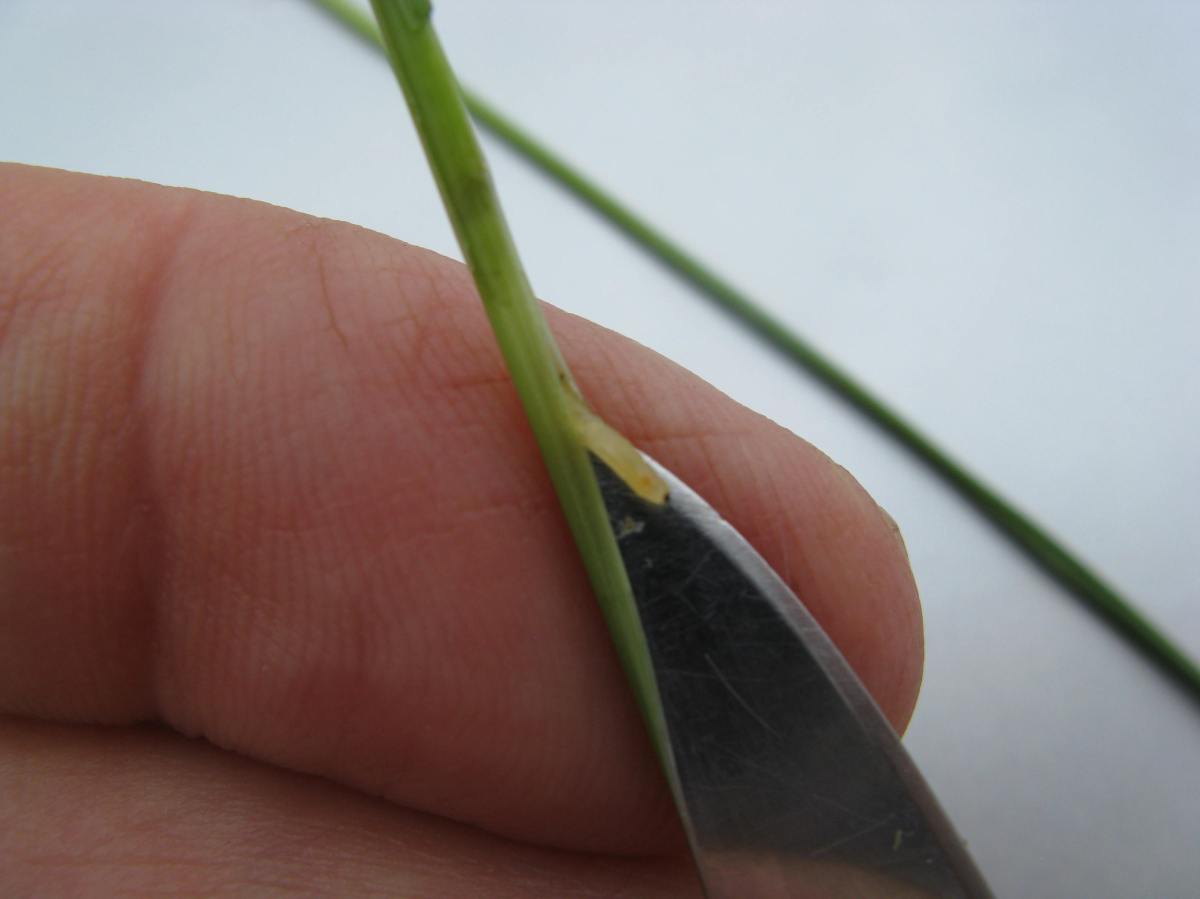
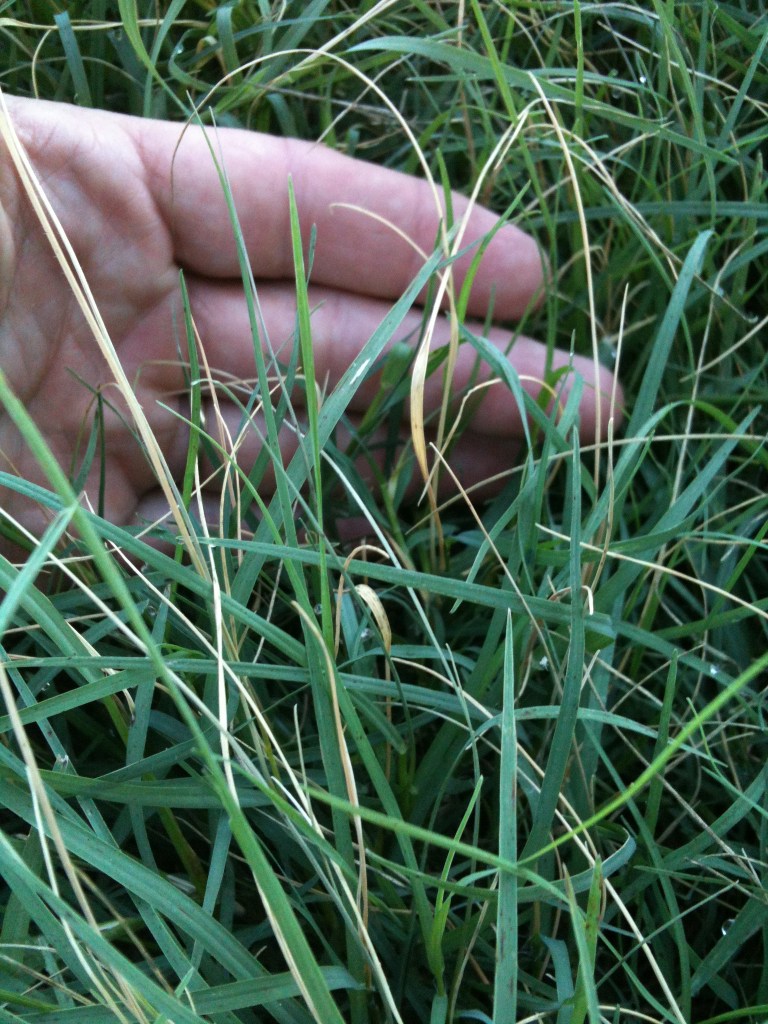
I sure don’t want to sound all doom and gloom, but we do need to make sure all our organic pasture and hay growers are aware of a severe problem that is only getting worse. Organic bermudagrass hay or grazing producers should know this insect and unfortunately bermudagrass stem maggot (BSM) is here, and it doesn’t seem to be going away!
If you are not sure about this insect or the damage it causes, then walk out in your pastures and look at all the dead tips (picture above). I can find it in almost any pasture or hay field I walk out in. This insect has four life stages: the adult is a small fly, the adult lays an egg on the bermudagrass stem, the egg hatches a maggot or small larvae that burrows into the stem and feeds for several days. The feeding it does cuts through the topmost leaves so that they die. These leaves that died look just like a killing frost came through without the cold weather.
Alicia, Coastal and Tifton 44 are the most susceptible since they are finer textured bermudagrasses. Tifton 85, which is a coarser grass, just doesn’t have as much of a problem with BSM as others.
What can you do as an organic producer? One option for mitigating the damage caused by BSM is through harvest management. If damage is found within 1 week of the normal harvest stage, then harvest the crop as soon as weather conditions allow. Once you see the damage, you are not likely to get much more yield. If damage is within 1 to 3 weeks after the previous harvest, it is also likely that the crop will not add a significant amount of yield. The damaged crop should be cut and (if the yields are enough to bale!) baled and removed from the field as soon as weather conditions allow. Leaving the damaged crop in the field will only compete with any attempts by the plant to regrow and decrease the opportunity that the next cutting will have to accumulate mass.
Can you treat organically? Yes, if you need to treat, then an organic pyrethrin or pyrethrin mix is an option. Pyganic is a natural pyrethrin and is effective but please buffer your water down to a 5.5 pH if possible and it is best not to mix with other products.
Current recommendations are to treat after a cutting if damage levels are high. Best results have come from treating twice—once a few days after baling the previous crop as the grass begins to resprout and again 5 to 7 days later.
Another possibility is the many and varied botanical products (cinnamon, garlic, clove, etc.), but this may be hit or miss! As always check with your certifier before making any treatments. In this dry year we can’t afford to lose any hay to BSM!
Wrapping parts of field bindweed plants from the nursery infected with Gall Mites around field bindweed plants in the South Plains. Introducing the beneficial Gall Mite to help control this noxious weed.
Some time back I wrote a blog post about using some biological methods for controlling field bindweed (click here to read). I liked the idea of introducing the Field Bindweed Gall Mite (Aceria malherbae) to areas of field bindweed and hoping they would help to keep this weed from taking over fields. Sounds easy till you try finding the mites!
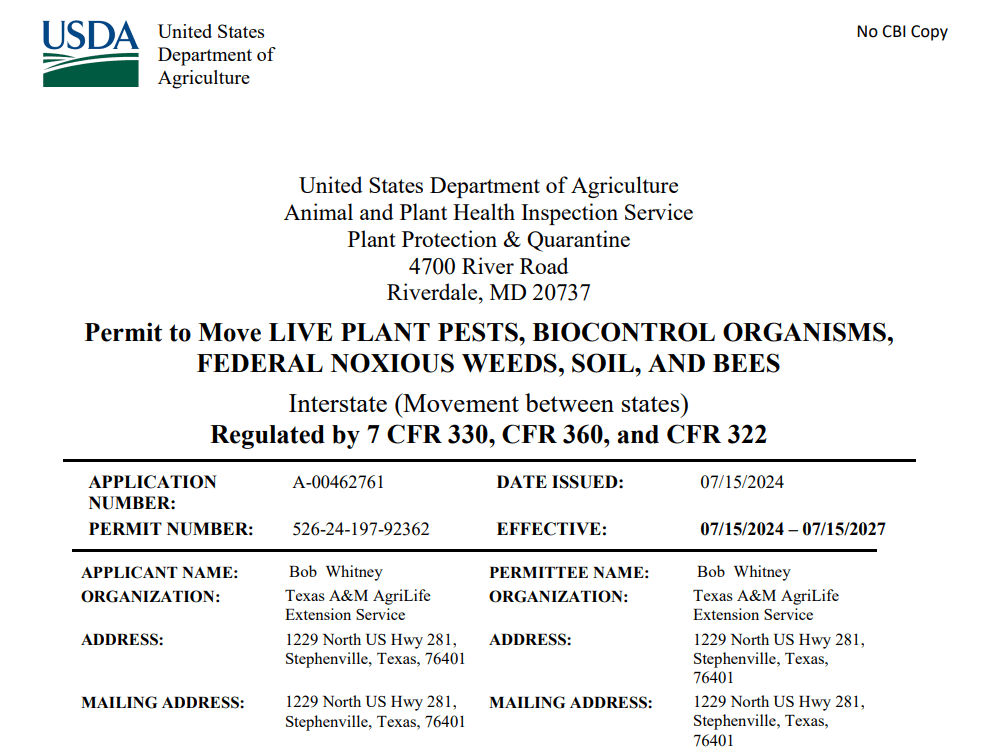
Most of the information pointed me to the State of Colorado and Nina Louden Biocontrol Specialist with the Colorado Department of Agriculture. The first thing Nina asked me, “Do you have a USDA permit to allow us to ship “biological control agents” across state lines?” At that time, I didn’t even know there was a need for a permit, but I soon found out you can apply for one online. There was much in the application process I didn’t understand but overall, it was simple and easy. I got my “permit” as you can see below
USDA Permit to ship and apply Field Bindweed Gall Mites
I sent Nina the USDA permit by email and her response back was we will ship you the Gall Mites on Monday of the next week to arrive by noon on Tuesday. The mites are harvested in Colorado from growing field bindweed by simply cutting off pieces of field bindweed that are infected with the mites and shipping them in a cooler with cold packs. My next call was to Carl Pepper, South Plains Organic Cotton Farmer to see if he was able to help me put out the mites on one of his fields.
Field bindweed with the Gall Mites on the plant are harvested and sent to us for distribution.
Carl and his family had a perfect location next to an organic cotton field. The area between the county road and the field was infested with field bindweed and the weed was growing out in the cotton rows where Carl could not plow it out. We put the gall mites into two 10′ X 10′ squares well marked and will monitor their “survivability” and ultimately measure their spread out from the 10′ X 10′ area to the field.
Carl Pepper is applying the field bindweed pieces to the existing field bindweed plants in his field. We did this by wrapping the pieces around the existing plants. The mites will move from the old plants to the new looking for fresh food sources.
Will it work? I don’t think any of us know for sure, but we have to try! The field bindweed gall mite is not going to eradicate field bindweed on the South Plains. But our hope is that as the field bindweed comes out each spring the gall mite is also out and feeding on the field bindweed. This will significantly slow the growth of the bindweed and hopefully keep it in check. Something we don’t have now!
Click on the picture above to read this publication about the Gall Mite and how Colorado State Department of Agriculture ships them out. This service was free of charge and very easy to do. I hope to get more to release in other places soon.
As many of you know Timber Darnell, our first Texas TOPP Program Coordinator moved to be with family in Nebraska. She did a great job getting things up and running for Texas TOPP but now I am glad to introduce you to Tyler Cox who is starting August 1st.
Tyler has an undergraduate degree from Tarleton State University in agricultural services and development and he just recently finished his master’s degree in spring of 2024 in agricultural and consumer resources with an emphasis in agribusiness. Tyler will be down the hall from me at the Texas A&M AgriLife Research and Extension Center in Stephenville but expect to see him out and about at many Texas meetings. He is responsible for developing programs that reach out to folks interested in organic agriculture and help any who want to transition to organic. He will also be working on some organic research and extension programs that help organic producers and increase our overall organic knowledge
I was scrolling through my LinkedIn this morning (Monday, July 15, 2024) and saw a post by Dr. Joseph Burke that I just had to check out!
Just click on the picture to read the full research paper!
I am going to cut through all the information in the full-text and give you a look at the mini version. Let’s start with the abstract from the first page.
Abstract: By improving soil properties, cover crops can reduce wind erosion and sand damage to emerging cotton (Gossypium hirsutum L.) plants. However, on the Texas High Plains, questions regarding cover crop water use and management factors that affect cotton lint yield are common and limit conservation adoption by regional producers. Studies were conducted near Lamesa, Texas, USA, in 2017–2020 to evaluate cover crop species selection, seeding rate, and termination timing on cover crop biomass production and cotton yield in conventional and no-tillage systems. The no-till systems included two cover crop species, rye (Secale cereale L.) and wheat (Triticum aestivum L.) and were compared to a conventional tillage system. The cover crops were planted at two seeding rates, 34 (30.3 lbs./ac.) and 68 kg ha (60.7 lbs./ac.), and each plot was split into two termination timings: optimum, six to eight weeks prior to the planting of cotton, and late, which was two weeks after the optimum termination. Herbage mass was greater in the rye than the wheat cover crop in three of the four years tested, while the 68 kg ha (60.7 lbs./ac.) seeding rate was greater than the low seeding rate in only one of four years for both rye and wheat. The later termination timing produced more herbage mass than the optimum in all four years. Treatments did not affect cotton plant populations and had a variable effect on yield. In general, cover crop biomass production did not reduce lint production compared to the conventional system.
This last statement, “cover crops did not reduce lint production,” is hugely significant and yet it is exactly what many organic cotton producers have been saying for years!
Temperature and Rainfall data during the study
To continue the “mini version” of the research let’s turn to the Summary and Conclusions on page 9 of the research paper.
The semi-arid Texas High Plains presents challenging early-season conditions for cotton producers. Cover crops can help mitigate erosion and protect cotton seedlings from wind and sand damage without reducing yields compared to conventional practices if managed appropriately. Effective cover crop management is needed to optimize cotton lint yield compared to conventional tillage systems. We focused on three cover crop management practices: species selection, seeding rate, and termination timing. With regard to species selection, rye produced greater herbage mass in three of the four years. The seeding rate had less of an effect on herbage mass; doubling the seeding rate from 34 to 68 kg ha (30.3 – 60.7 lbs./ac.) did not contribute to increased herbage mass. This change in seeding rate only causes an increase in seed costs, and this trend held true for both species and termination timings. Termination timing had the most significant effect on herbage mass, with a two-week delay in termination timing, increasing herbage mass production from 44 to 63%. At the targeted termination time of six to eight weeks before planting, rye and wheat experienced increased growth as they transitioned from vegetative to reproductive growth. This critical period makes termination timing an essential aspect of herbage mass management. Termination timing can also impact the carbon-to-nitrogen ratio, where higher C:N at later growth stages can increase N immobilization. While water availability or allelopathy concerns are cited as risks for cotton germination and emergence when using cover crops, cotton plant populations were not affected in this study.
Cotton lint yields were not impacted by increasing cover crop herbage mass, except in 2018, when greater wheat biomass resulted in decreased lint yield compared to the conventional system. In each year, wheat or rye at a 34 kg ha (30.3 lbs./ac.) seeding rate and optimum termination timing resulted in cotton lint yields not different than the Conventional Treatment. While yield potentials can differ between years depending on precipitation and temperatures, effective cover crop management can help sustain cotton lint yields when compared to conventional treatments. Rye seed tends to cost more than wheat, but it grows more rapidly and could be terminated earlier to allow for increased moisture capture and storage between termination and cotton planting. (below is the final sentence in the paper and summarizes well the entire study)
“This research demonstrates that with effective cover crop management, the implementation of conservation practices can be successful in semi-arid cropping systems.“